I’m fascinated with the idea of being able to make any food at home. For example, in a post-apocalyptic world that still has electricity, but where bacon is illegal, would I be able to make it myself from scratch? Now I know that the answer is probably, “yes!” Before discovering that I could make bacon, however, I needed to learn how it was made. I knew it was smoked, but I didn’t realize that the process always required curing.
The reason I didn’t know bacon had to be cured was because of misleading packaging at grocery stores that claims some bacon is “uncured.” Despite those claims, their bacon is, in fact, cured. It just doesn’t have the same SOURCE for the sodium nitrite/nitrate preservatives used in cured bacon. Stated another way, uncured bacon still uses nitrites/nitrates, but it just sources them from “natural” sources (unless the packaging explicitly states that there are no nitrates). So, don’t be fooled because as it turns out, if you don’t cure the pork belly before making bacon, it ends up tasting a bit like ham rather than bacon. Curing means the process to make homemade bacon takes about a week, so patience is a virtue.
I wish I could tell you that making bacon at home is worth the wait, but it probably isn’t for most people just looking for a couple of strips for breakfast or a sandwich. Despite the immense satisfaction one receives after spending a week making a successful product, the reality is that it will probably taste very much like good quality bacon anyone can purchase from a grocery store. The real benefit is that you can flavor the bacon however you want through the cure used and you can cut the slices as thick as you like, which is fun. My recommendation is to make this recipe successfully once and then try to experiment with the flavors. Make it sweeter or more peppery or infused with maple extract. Cut a thicker than usual slice cooked low and slow and pretend you’re having a bacon steak! The sky is the limit.
UPDATE TO RECIPE: A reader wrote to me informing me that he followed this recipe exactly and the end result produced extremely salty bacon. While this recipe did work out for me soaking the bacon in a cold water bath after smoking, I have adjusted the amounts of salt in the recipe to use less salt. The goal of the salt (aside from seasoning) is to make sure bacteria doesn’t have a hospitable environment to grow. Nonetheless, it’s all about balance and making sure the end product works. As always I appreciate reader feedback and understand that what may work for me or may work once may not work for everyone under all circumstances. I’m always happy to revisit a recipe based on feedback!
Homemade and Wet Cured Bacon Recipe

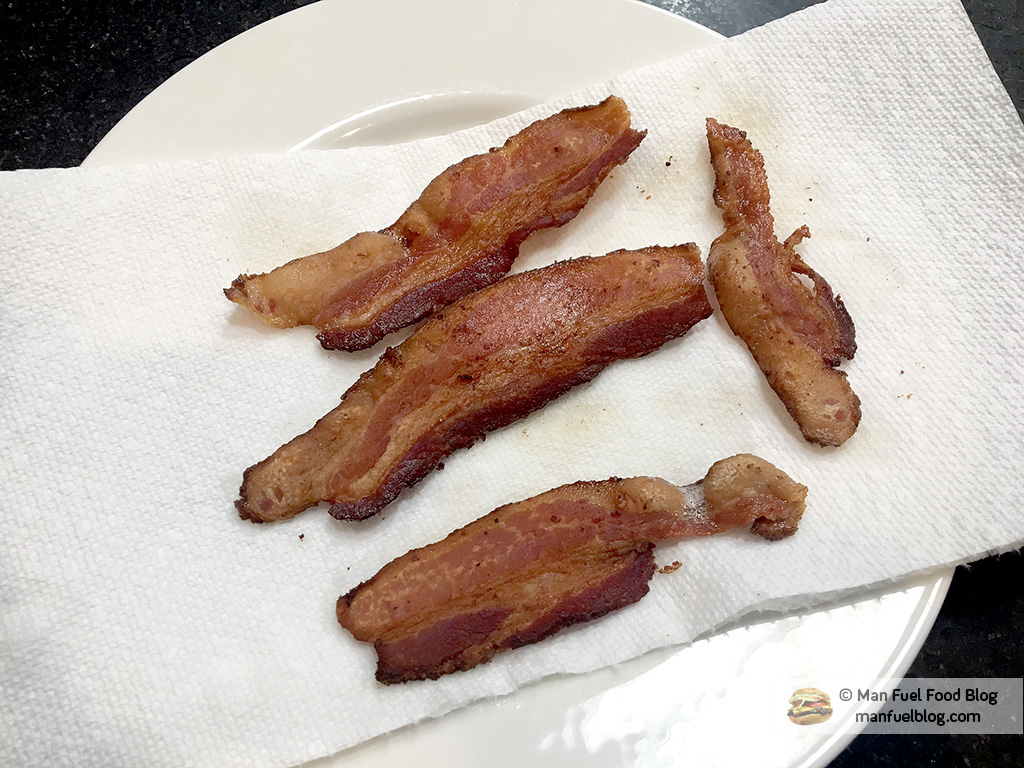
Wet cured and smoked bacon.
Ingredients
- 2 pound slab of pork belly with or without skin
- 2 cups of water
- 2.5 tablespoons of kosher salt
- 2 tablespoons of brown sugar
- 2 teaspoons of paprika
- 1 teaspoon chili powder
- 1/4 to 1/2 teaspoon black pepper
- 1/2 teaspoon pink curing salt / Prague powder / curing salt NOTE: This is different than Himalayan pink salt, so please be sure about what you are using!
- Apple or cherry wood chips soaked in water
- Optional: Apple juice
Equipment
- Large plastic food storage zip top bag
- Long, sharp knife (if the pork belly has skin)
- Large bowl
- Tongs
- Smoker (electric, wood, or charcoal)
- Cup, tablespoon, and teaspoon measurement tools
- Spoon
- Meat thermometer
Directions
- Rinse and pat dry the pork belly.
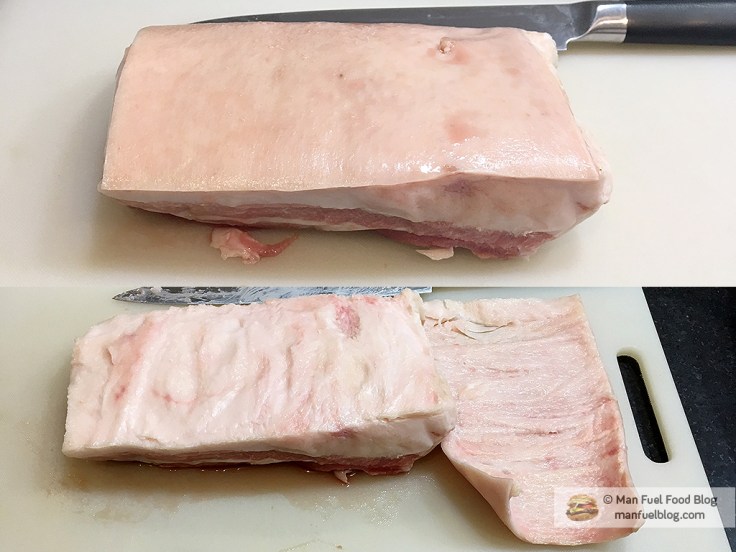
- If the belly has skin on it, very carefully remove just the skin using a long, thin, and very sharp knife. Leave as much of the fat as you can. Depending on your knife skills and the quality of your knife, this can be very easy or very difficult. Do your best and don’t toss that skin! You can use it later to make pork rinds or skin-only chicharron.
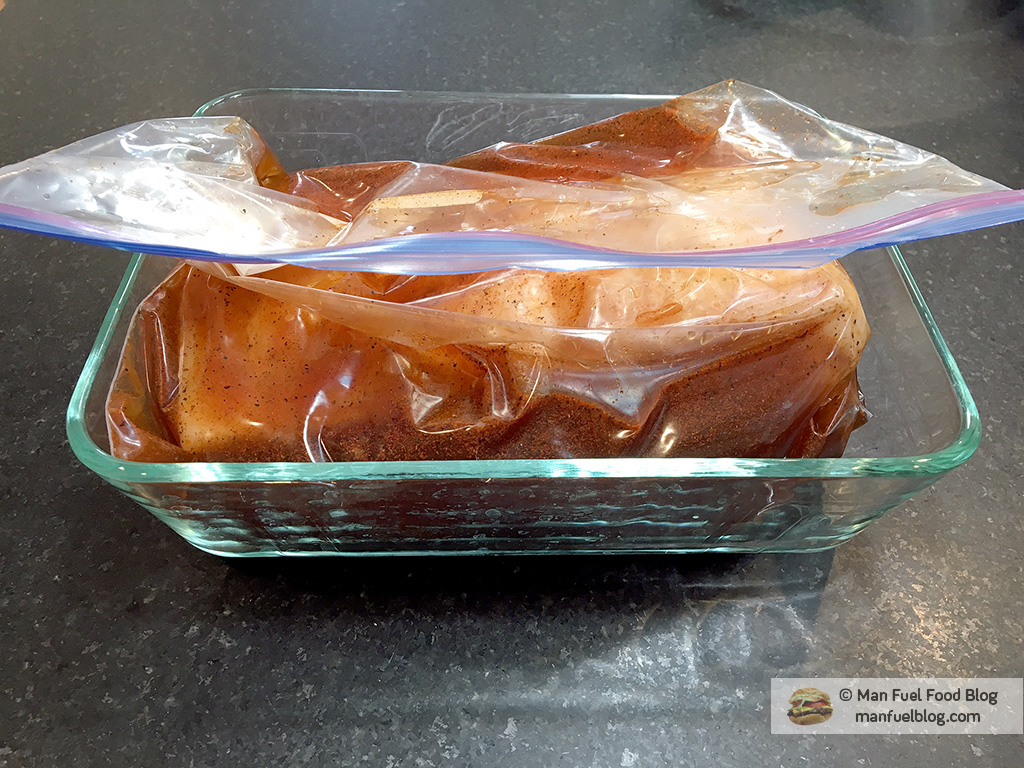
- With the skin removed place the pork belly into a large zipper bag.
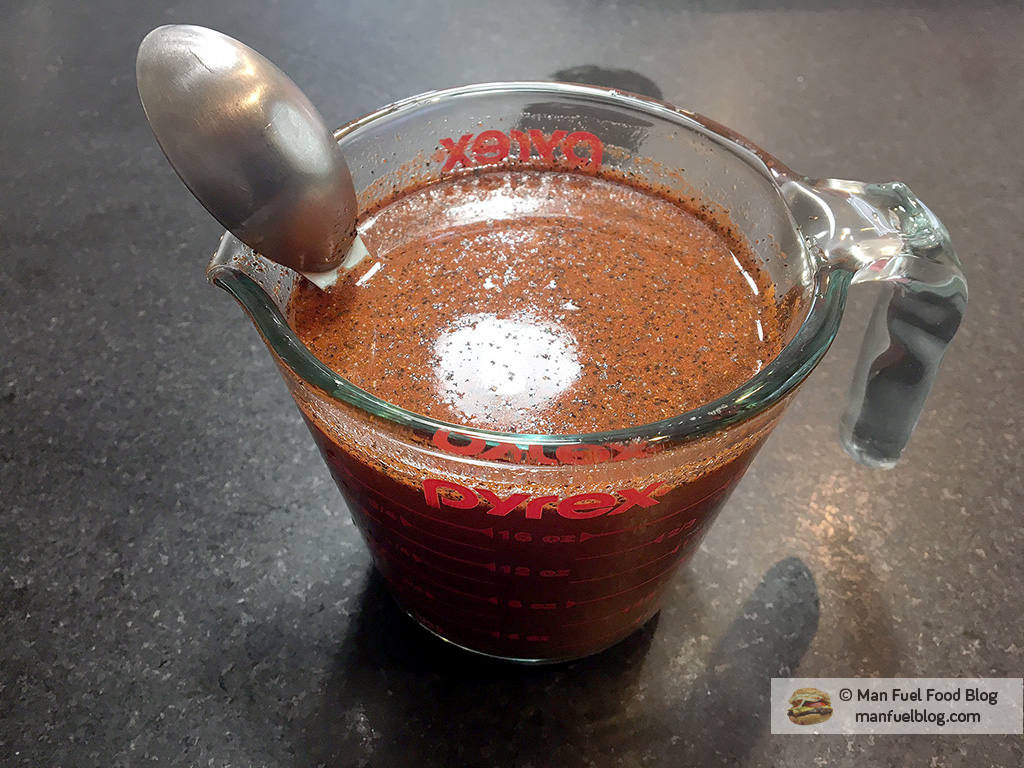
- In a bowl or measuring cup, mix the 2 cups of water, 3 tablespoons of kosher salt (the water and salts are all you really need for a cure, but the rest is for flavoring), 2 tablespoons of brown sugar, 2 teaspoons of paprika, 1 teaspoon chili powder, 1/4 to 1/2 teaspoon black pepper and 1/2 teaspoon pink curing salt. NOTE: The last ingredient in the list (pink curing salt) is the preservative (sodium nitrite/nitrate) that helps to keep the meat pink and from growing bacteria. People have mixed reviews about whether or not to use it and whether or not it is bad for you. The goal is to use as little as possible, but still get the benefits to ensure a safe product at the end. If you really want, you can use this recipe without the pink curing salt, but make sure to cook the pork belly to 160 degrees instead of 150 degrees.

- When the solution is well mixed, pour it into the bag over the pork belly. Then carefully squeeze out as much of the air as you can from the bag and seal it.
- Place the zipper bag with the belly in it, in a large bowl or container just in case it leaks. Place that bowl in the fridge and let it sit for two days.
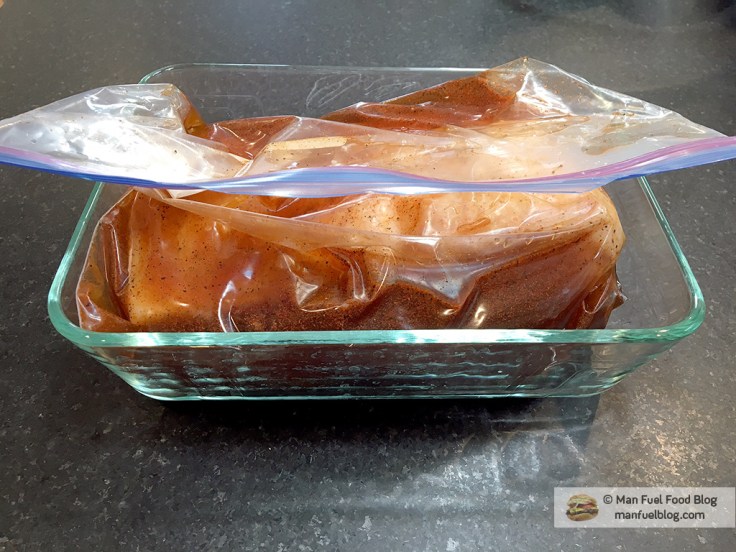
- After two days, flip the pork belly over and let it sit another two days. Repeat this process for up to 7 days and no longer.
- At the end of the seventh day, dump the liquid out of the bag containing the now cured pork belly and rinse the pork belly under cold running water to wash off any excess cure.

- After rinsing the pork belly, fill a large bowl or container with cold water. Submerge the pork belly in the bowl of cold water and place it in the fridge to let it soak for an hour. When an hour is up, dump the water and replace it with fresh cold water. Repeat this process for 2 hours. The goal is to remove the excess salt that has absorbed into the bacon, so that it isn’t overly salty. NOTE: It is possible to soak the bacon after finishing it in the smoker and you may need to do so like I did. It’s better to do it before, but if the bacon is still too salty, soaking afterward works just fine. Cut the ends of the bacon off and soak for 2 hours in cold water, hanging the water every hour.
- Finally, it’s time to get smoking! Pre-heat the smoker to 200 degrees F. Fill the water pan of your smoker with apple juice, water, or a mix of both. This provides moisture so the bacon doesn’t dry out, but also some sweet flavor.
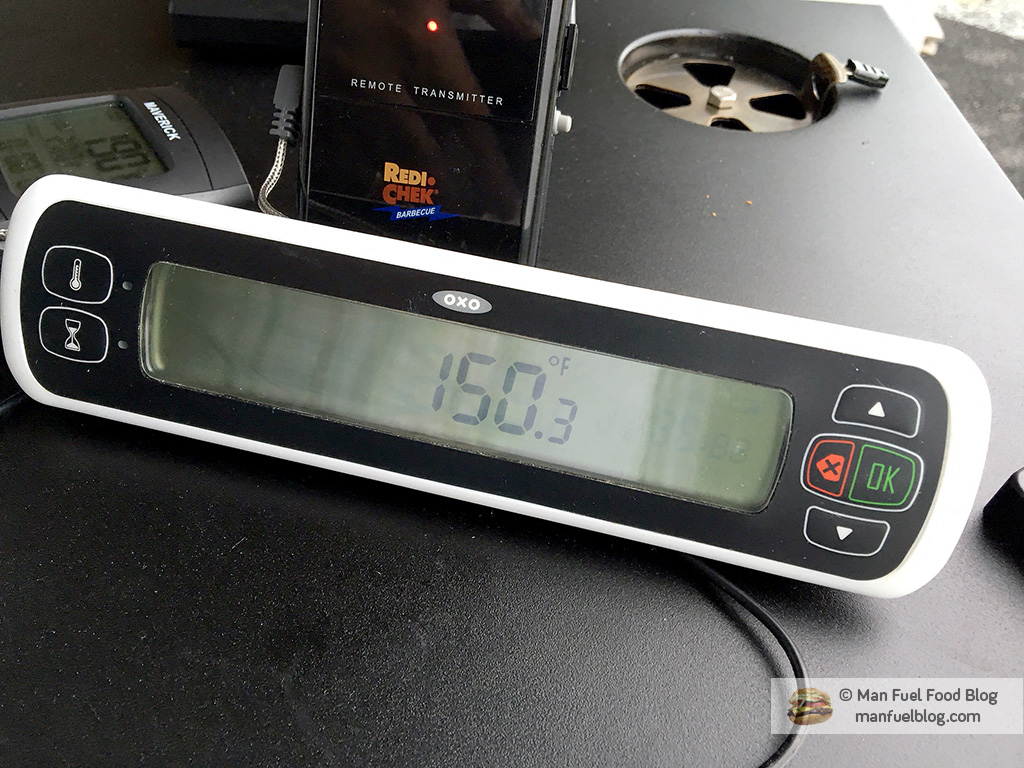
- Place a meat thermometer into the thickest part of the pork belly, so that you can gauge the internal temperature properly.
- Put the pork belly into the smoker, close it up, and add the wood or wood chips. I prefer to use apple or cherry wood because it gives the bacon a milder smoke flavor with a touch of sweetness. If you use anything stronger (like pecan, mesquite, or even hickory), then you should go very light with the amount of wood so as not to over-smoke the bacon. For an electric smoker, I used a 1/2 cup of soaked apple wood chips (or a mix of apple and cherry wood) added at the beginning of the cooking process. This is plenty of smoke, but for those that want it smokier, add another half cup of wood chips after the first hour. I wouldn’t add more than that or the bacon will just taste like a slab of burned wood.
- When the bacon reaches an internal temperature of 150 degrees F, it’s ready. A two pound slab of pork belly will take roughly 2.5 hours to reach 150 degrees F.

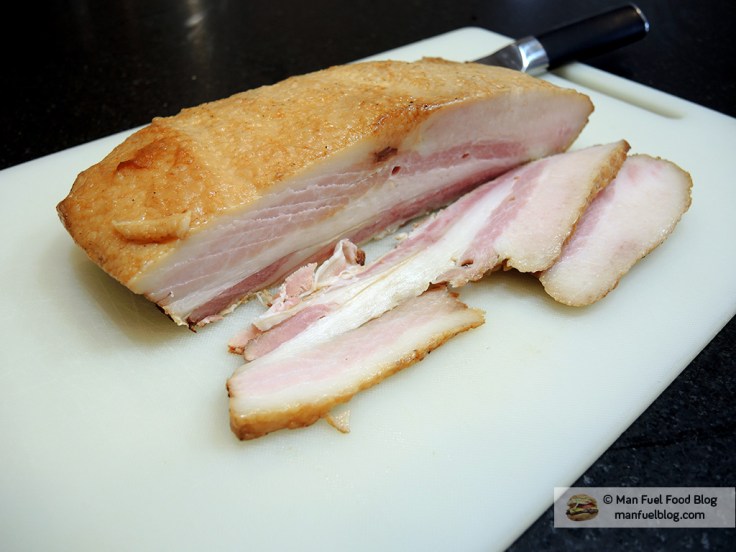
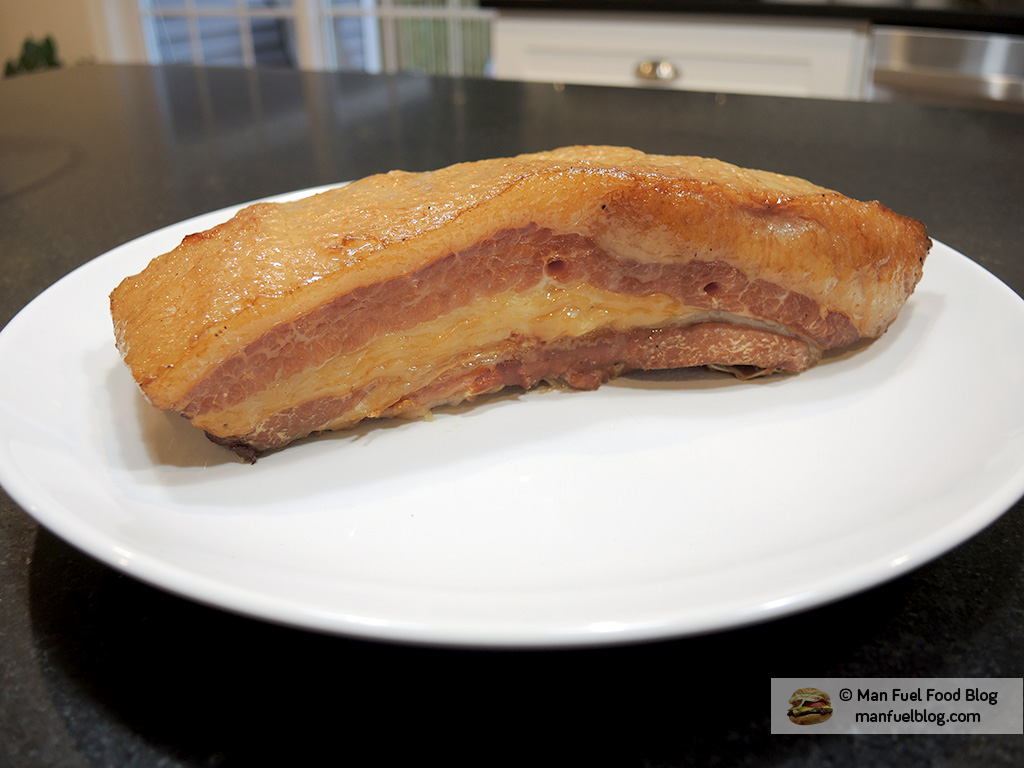
- Remove the bacon from the smoker and take a whiff of what will soon be your homemade bacon! Let it cool completely first and then place it in an airtight container or zipper bag in the fridge until you’re ready to cut it. Cold bacon is much easier to slice, so I recommend letting it cool. Depending on how you flavored your cure, the color of the bacon mixed with the smoke from the wood chips may result in some interesting colors for the outside of the bacon, but that’s expected. The interior should still be nice and pink.

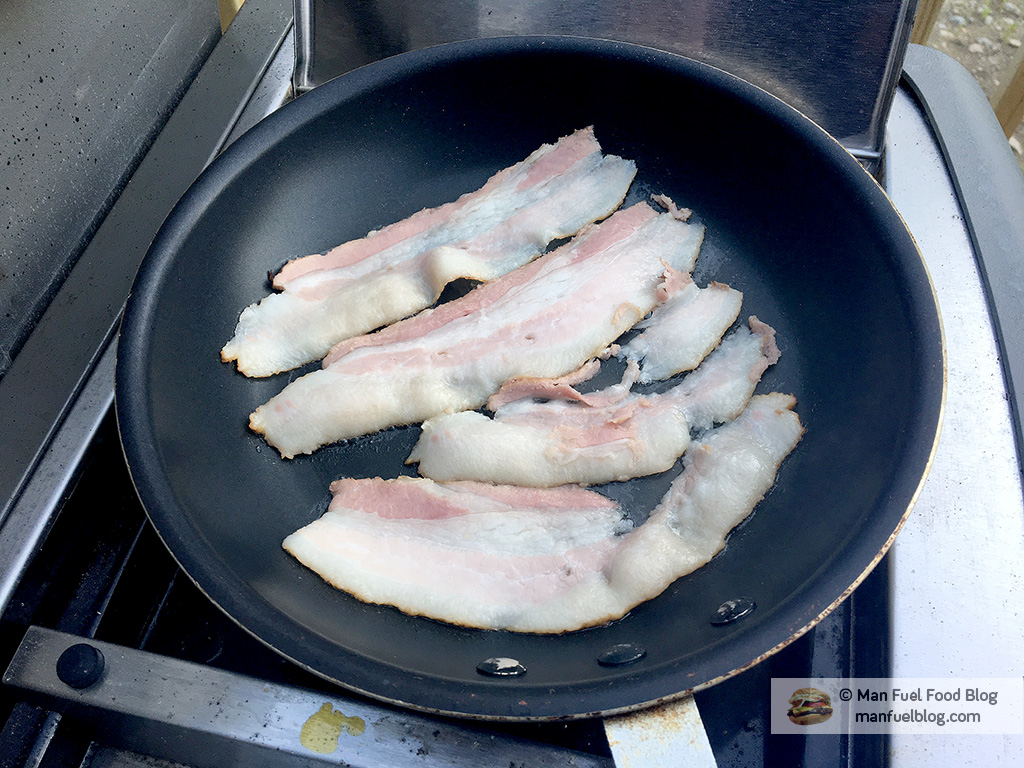
- When the bacon is cooled down, use a long, thin, and sharp knife to cut the rind (the dark outer bark of the bacon) along the length of the slab. This piece is edible, but it will probably be very salty and it won’t be the best expression of the bacon. The inside, pink, part of the bacon is what you really want. Cut thin or thick slices and enjoy! Thicker slices requires a long and slow cooking method, while thin slices can be cooked like any store-bought bacon.


_______________________________
Please Support Home Is A Kitchen!
No spam. Just real updates on recipes, restaurant reviews, travel, and free giveaways!
![]()
![]()
![]()
![]()
_______________________________

Yes, I love this!!! It looks great. How’d it taste?
It tasted great and pretty much like store-bought bacon. I enjoyed cutting thicker slices though. Next time, I think I’ll add a little maple extract to the cure and see if I can make maple bacon!
I definitely think that would definitely work for sure, let us know 😊
i love the maple additive it give a great flavor
Lovely bacon with a great layer of fat. Great job.
Thanks! I was surprised how easy it was to make. Other than the time commitment, I’d happily make it again.
I continually make adjustments to this recipe and always make great bacon. I double the salt, as I like salty bacon. My current cure is just salt and garlic powder. Never too much garlic! I will rub the bellies hard with fresh ground black pepper and do a hickory smoke in my master built. Great every time!
So glad you’ve been enjoying it! Great idea with the simple seasoning and black pepper!
I shake rough ground black pepper on the fat side of the bacon before smoking. I set my smoker at 100 and smoke for two hours. I get 150 every time.